Phased deployments were introduced in Technical Preview 1801, and quickly made the transition to the latest Current Branch release, as a pre-release feature. A pre-release feature, is a feature that is fully supported by Microsoft in the production environment. However, they are not turned on by default and you will need to enable the feature to take advantage of it. Note that a pre-release feature is still in active development and could change before being promoted from the pre-release category.
So, What Exactly Are Phased Deployments?
Phased deployments allow you to automatically sequence a deployment across multiple collections. They currently only exist as task sequence deployments. Hopefully, with future releases of SCCM, we will seem them utilized for other deployment types.
You can create a deployment with a default of two phases. With future SCCM releases you will be able to manually configure multiple phases, Technical Preview 1805, for example, allows you to configure a maximum of 10 phases.
At present, phased deployment task sequences do not support PXE or media-based installations. Also, phased deployments are not visible to administrators that do not have the ALL security scope. Also, you will not be warned if you deploy a phased deployment to a high-risk collection—be careful!
Enabling Pre-Release Features and Phased Deployments
To use phased deployments in your SCCM environment, you must enable pre-release features for the whole hierarchy. Once enabled, you can turn on specific pre-release features.
To allow pre-release features to be used, navigate to \Administration\Overview\Site Configuration\Sites. Select your site and then click the Hierarchy button in the ribbon.
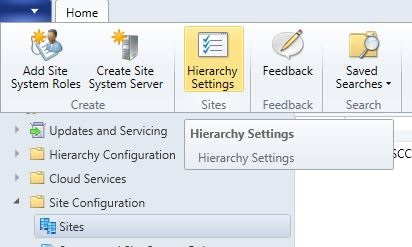
In the General tab, select Consent to use Pre-Release features. Once switched on, this change cannot be reversed. You’ll notice that in the screenshot below, the checkbox is greyed out, this is because the feature had been enabled previously.

With consent enabled, the next step is to turn on the phased deployment feature itself. Pre-release features are located in \Administration\Overview\Updates and Servicing\Features in the SCCM console. If you are upgrading to 1802, you can switch on the feature as part of your upgrade.
Right-click the Phased Deployments feature and Turn on.

Setting up the deployment collections
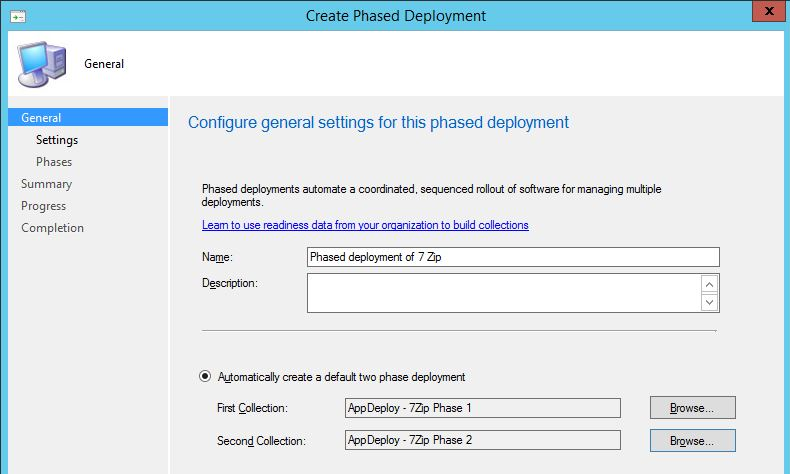
Let's keep things simple for our blog post example. I have created two collections which I am going to target with my phased deployment. I have the collections AppDeploy – 7Zip Phase 1 and AppDeploy – 7Zip Phase 2. Each one of the collections contains a single device. I want to deploy 7 Zip out to my phase one collection. Only when I am happy that this deployment is within certain parameters of success, do I want my deployment to the phase two collection to kick in.

Creating a Phased Task Sequence
Select Create Phased Deployment from the ribbon, alternatively you can right-click the task sequence and choose the option. You can only select this option if your task sequence matches the requirements for a phased deployment – no PXE or media installation if you recall.

When the wizard appears, you need to specify the default two phases for the deployment, targeting the relevant collections for install.
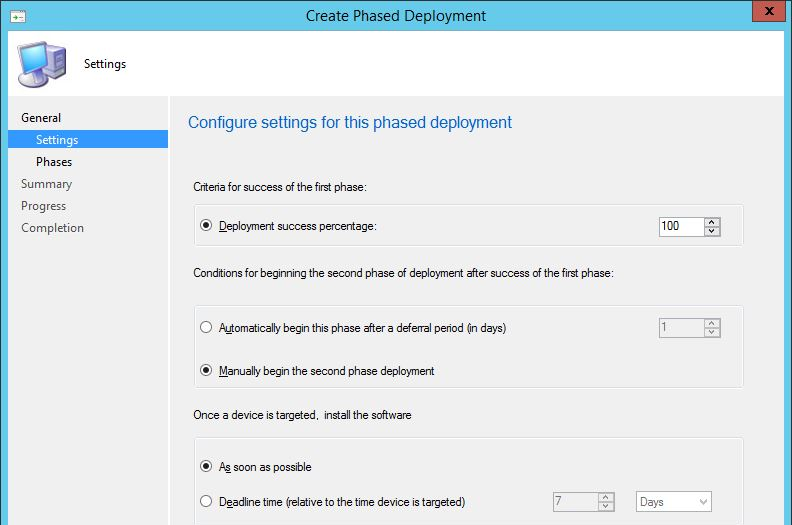
At the next screen, you configure three settings for the phased deployment.
- A percentage of success for the phase one deployment. Since I am deploying to a single device, I need my percentage of success to be 100%. This figure needs to be set accordingly for your deployment. The default is 95%.
- An automatic or manual start to phase two deployment. The automatic commencement can be deferred by a number of days or set to 0 if you want to get phase two rolling as soon as possible. I have set a manual start to phase two, so that I can show you the extra steps needed to achieve this.
- Installation timing. You can make the software install as soon as possible or deadline the install for a later time, in days.
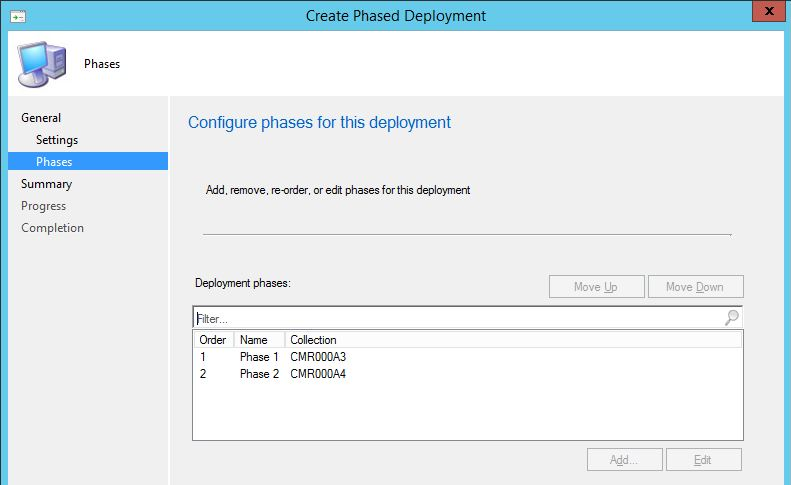
In a future SCCM release, ConfigMgr admins will be able to add further phases to the deployment. For now, only the order of the phases can be adjusted, or existing phases edited, before completing the wizard.
Once created, information about the deployment is available in the Phased Deployments tab.
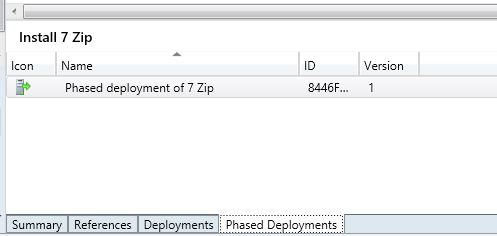
In the Deployments tab, phase one of the deployment is populated. Phase two isn’t available at this stage. If the phased deployment is set to automatically begin phase two, then it will appear here once the percentage of success for phase one is achieved. Since I have set phase two to be started manually, I will have to kick start the phase two process.

With the Deployments tab selected, some new buttons are available in the ribbon. These allow the control of movement to the next phase. If there’s an issue you can Suspend the move, and Resume when ready to continue on.

You can check the normal deployment monitoring methods in SCCM to keep track of your deployment. When the Compliance % reports back the level of success the deployment needs, then phase two will kick in.

As mentioned, I have set my phase two deployment to be manually triggered. To do this I have to click Move to next phase by highlighting the phase one deployment and either selecting from the ribbon or right-clicking and choosing from the context menu.
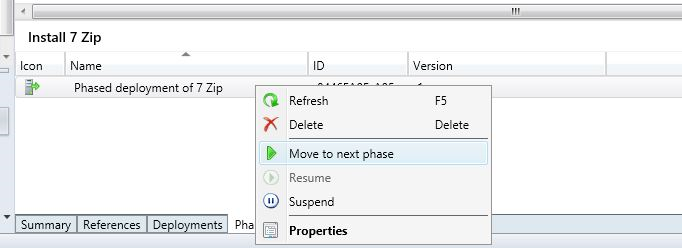
The second phase is now visible in the Deployment tab.

If everything goes through OK, the deployment will be a success.

As always in SCCM, we have a log file that we can look at to investigate problems. It’s the SMS_PhasedDeployment.log on the site server.
Looking Ahead
Phased deployments are a nice new feature to SCCM. They allow admins to start controlling the flow of deployments within the environment with ease. We can expect this feature to grow as Microsoft gets feedback from the community.
For now, take a look at this great new feature and feedback to us with some of your successes or failures when using it in your environment.


