Implementing third-party patching on a remote SUP involves a little bit more than just flipping the Enable Third-party Updates checkbox, like we can do when the SUP sits on the primary site server. As mentioned earlier in the report, there are some pre-requisites and considerations for a remote SUP. Let’s run through that process to give you a better understanding.
Both the WSUS instance and the SUP need to be running in SSL mode for this to work. You will need a server authentication certificate, and this could be from an internally controlled PKI authority or from an external certificate provider. We won’t go into that process here, but there are many guides out there that detail the steps needed to generate a server authentication certificate. Ultimately, you will need to import the server authentication certificate onto your remote SUP site system server before proceeding with the rest of the steps below.
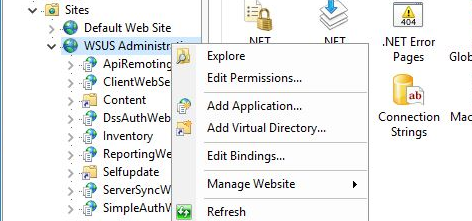
Once you have the certificate imported this will need to be applied to the WSUS instance. To do this open the Internet Information Services (IIS) Manager on the remote SUP server and navigate to the WSUS Administration site. Right-click this node and select Edit Bindings from the context menu.
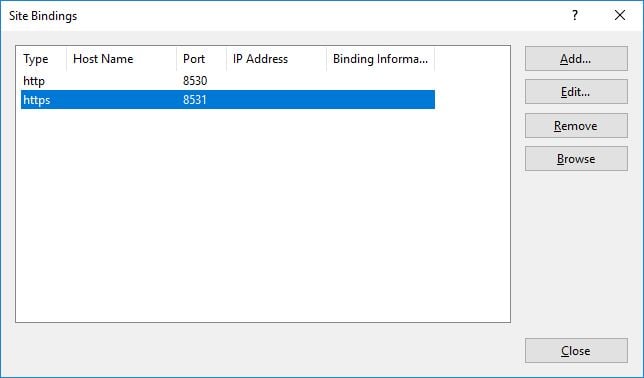
Select the https binding that needs to be secured with the certificate and click the Edit button.
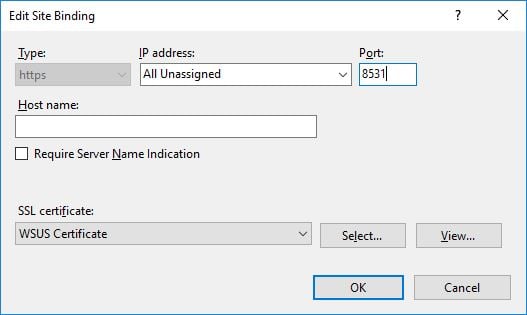
Click the SSL certificate drop down to select the required cert. As mentioned, the certificate will need to be imported on the SUP server otherwise it will not be visible for selection in this drop down. Ensure you have the default port at 8531, although this should be automatically selected for you.
The next step is to set Require SSL on the WSUS virtual directories. Note that Require SSL is not required on all the virtual directories, only the following listed:
- APIremoting30
- ClientWebService
- DSSAuthWebService
- ServerSyncWebService
- SimpleAuthWebService
For completeness, the following virtual directories do not need the Require SLL checkbox enabling:
- Content
- Inventory
- ReportingWebService
- SelfUpdate
To set Require SLL, right click on the virtual directory required and click the SSL Settings icon in the main body of the IIS Manager window.
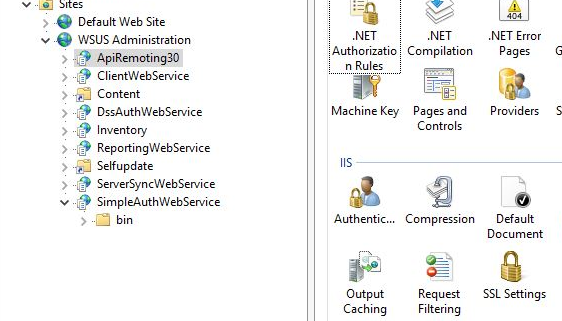
Check the Require SSL checkbox and click the Apply link. Repeat this process for the required virtual directories.

If you are dealing with any downstream servers, from the remote SUP, then the certificate from the certificate authority must be imported into the local computer Trusted Root CA store, or the Windows Server Update Service Trusted Root CA store on all the downstream servers. Also, the certificate needs to be imported into the same stores on all client computers which will communicate with the remote SUP and any computers which run the WSUS Administration Console.
Finally, SSL needs to be configured on the root WSUS server. This is achieved by running the command Wsusutil configuressl <certificatename> from an administrative command prompt. The <certificatename> must be the FDQN name of the certificate. This command is executed from the %ProgramFiles%\Update Services\Tools\ folder. Restart IIS after this command has been run.
With WSUS secured, the next step in the process is to enable SSL on the Software Update Point so this role can communicate with the WSUS instance.
In the Software Update Point Properties window under Administration\Overview\Site Configuration\Servers and Site System Roles and the properties of the Software Update Point on the site system hosting the role, ensure that the checkbox Require SSL communication to the WSUS server is enabled.
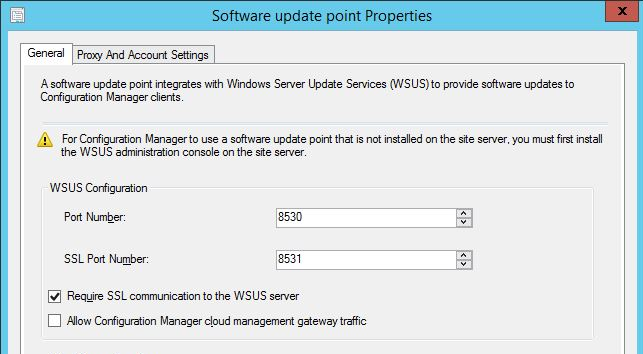
When making this change you must ensure the following pre-requisites are met to allow the creation of the self-signed certificate.
- The remote registry service should be running on the server hosting the software update point site system server.
- The WSUS server connection account, which will either be the site server computer object or one which has been allocated in your environment, needs remote registry permissions on the software update point site system server.
- The DWORD registry key HKLM\Software\Microsoft\Update Services\Server\Setup\EnableSelfSignedCertificates with the value of 1 needs to be set on the ConfigMgr site server.
With all this enabled, you will see secured communications to the WSUS instance reported in the WCM.log.
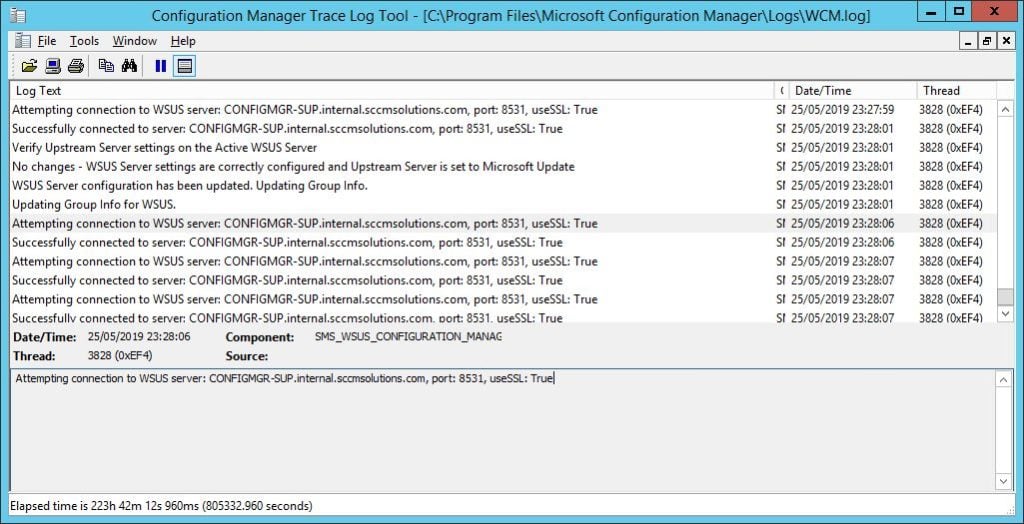
Next you need to enable third-party updates. This process is the same as for non-remote SUPs. Remember that, since you are dealing with a remote SUP, when you want to view the SMS_ISVUPDATES_SYNCAGENT.log. It will be located on the remote SUP server in the SMS\Logs folder.
With the SUP in SSL mode, you will need to ensure that your ConfigMgr clients are running in SSL mode too. This can be achieved by pushing out a client authentication certificate to the devices.
Look out for These Known Issues
Invalid Certificate Signature
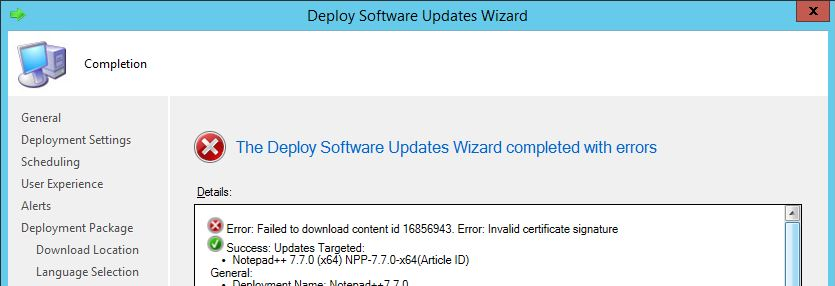
If you get an Error: Invalid certificate signature message when deploying out the updates, then you need to take action to resolve this. It’s a simple fix which requires you to ensure that the WSUS signing certificate is trusted.
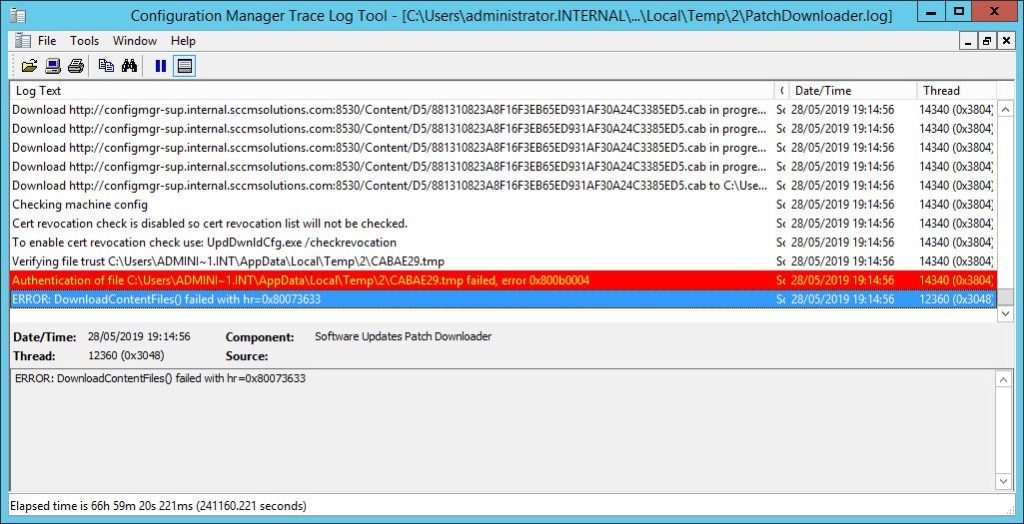
If you look at the patchdownloader.log file, you’ll see a 0x800b0004 error which confirms this is a trust problem. 0x800b0004 = The subject is not trusted for the specified action.
To resolve, this open up a certificates mmc with the command certlm.mmc and navigate to the WSUS store and export out the WSUS code signing certificate. This will export in a .CER format.
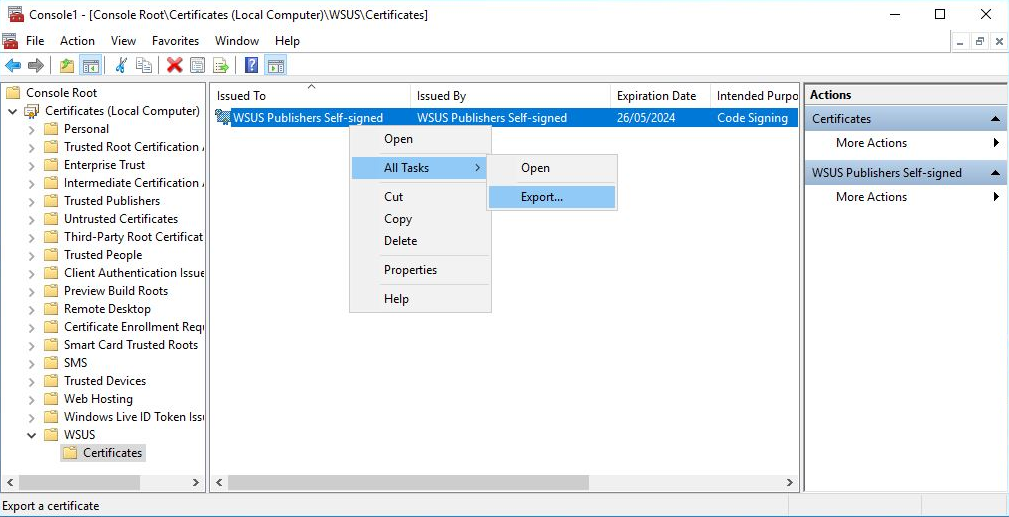
On the server which hosts the WSUS console (i.e. the primary site server), import the certificate into the following certificate stores in the certlm.mmc console:
- Trusted Root
- Trusted Publishers
Can’t Publish the Metadata
The third-party updates need to be fully managed by ConfigMgr. If you are using another tool to get the updates into the console, then you won’t be able to publish the metadata when you select the updates and choose Publish third-party software update content. If this is the case, then you will need to continue using the external tool to manage the updates.
Proxies May Cause Digital Signature Checks to Fail
When using a proxy from the top-level SUP server, it is possible that digital signature checks may fail due to the proxy. To avoid this, it is possible to configure the WinHTTP proxy settings on the site system.
New Version for the Catalog CAB File Format Needed
With third-party updates, ConfigMgr has a new version of the catalog CAB format which includes all the required certificates for the vendor’s binaries.
You will see these certificates added to the \Administration\Overview\Security\Certificates node in the ConfigMgr console once a vendor’s catalog has been approved and trusted.

If you are using the older catalog CAB format, you can continue to use these so long as the download URL is https and the updates are signed. Content downloads for these older format cabs will fail due to the fact that the certificate is not included in the CAB file. To mitigate, go to this node, unblock the certificate and publish again.
Want to Know More?
If you’d like to learn more about this, I’ve written a guide titled ConfigMgr Third-party Patching Primer. You can download it here.
May all your patching be simple and successful!


