Once in a while there is an opportunity to present something that feels truly revolutionary. Even though I was involved with the design of the Peer to Peer stack in OneSite, and wrote some of the code for it, by the time we were done, I was simply blown away by how beautifully it worked. It took a ton of work, and I’m very pleased to be able to describe it in this blog.
1. About PXE
PXE (Preboot Execution Environment, pronounced as pixie) has been around for ever. It originated as part of Intel’s “Wired for Management” initiative, and the current de facto standard, version 2.1, was published in 1999, jointly by Intel and Systemsoft.
At the time, I worked at Microsoft, as a program manager with the Windows Networking team, and it was really exciting to see, work on, and help manage a lot of new things coming out of Intel in those days.
However, when I look back at many of these things all these years later, they really didn’t work out that well: Wake on LAN, G.723.1/H.323 based IP conferencing, and yes, PXE.
Even though all these protocols were carefully designed, reused a lot of work that had been done at the standards bodies, and were vetted repeatedly, the kind of enterprise thinking that permeates these companies today wasn’t as prevalent at the time. It is really an irony that I have wandered into the candy store a second time and been involved in alleviating the shortcomings of all three of these protocols.
Challenges of deploying PXE on large distributed enterprise-scale networks are well known to all of us. I’ll enumerate them quickly and we’ll move on to P2P PXE:
- Deploying the server infrastructure required for PXE and TFTP
- Network configuration changes (IP helpers) required to routers
- DHCP server changes required, specially for those companies that run their DHCP servers on Cisco
2. Benefits of Peer to Peer PXE
These are exactly the reverse of the deployment challenges I listed above. This is not a coincidence, because we designed our Peer to Peer PXE protocol to exactly remove the shortfalls that exist in the current PXE protocol.
- No servers or server roles are required
- No router changes are required
- No DHCP server configuration changes are required
There is nothing to install, or configure, in any of your branch offices, period.
All you have to do is:
- Install one copy of Microsoft’s WAIK toolkit – a free download from here: WAIK Download
- In the Adaptiva Workbench, select the collections where you want PXE
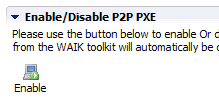
- Click the “Enable” button in the Adaptiva Workbench
Peer to Peer PXE is automatically enabled on all machines that belong to the selected collections – all within the next 1-2 minutes! What you’ll have is a completely elastic and self healing PXE infrastructure that continues to function, no matter how many machines go up or down, come online or go offline, break, or get fixed, and then get broken again.
3. Under the Covers
There are two core protocols that are required for a machine to boot its neighbor using PXE:
- PXE Server
- TFTP Server
Brutally efficient implementations of both these protocols are built into every OneSite client.
When you download and install the WAIK toolkit, OneSite server extracts the following seven tools, and packages them into an “Adaptiva WAIK Package”, which is then automatically deployed to all the required client machines – using the Peer to Peer protocols, and the WAN bandwidth management protocols that OneSite is getting known for.
- abortpxe.com
- bcdedit.exe
- boot.sdi
- bootmgr.exe
- pxeboot.com
- pxeboot.n12
- wgl4_boot.ttf
The clients now have everything they need in order to PXE boot fellow machines. OneSite’s Peer to Peer protocols take care of the rest.
4. The Real Mccoy
Seeing is believing, so here is a complete step by step walkthrough, including screenshots.
5. Open the OneSite Peer to Peer PXE Perspective
To start using Peer to Peer PXE, you must first open the “Peer to Peer PXE Perspective”, which contains UI for enabling and using Peer to Peer PXE.
- Open the “Home” perspective by clicking on the “Home” icon in the toolbar, as shown below.
- Open the Peer to Peer PXE perspective by double-clicking the item named: “OneSite – Peer to Peer PXE Perspective”, as shown above
- This will open the Peer to Peer PXE perspective, which is displayed below:
6. Enable Peer to Peer PXE
Enabling Peer to Peer PXE is straightforward and takes only a few moments.
- Open the “P2P PXE Settings” editor by clicking the “Edit P2P PXE Policy Settings” item in the “P2P PXE Task Navigator”
- This will open the editor window, which is shown below:
- Download the “Windows Automated Installation Kit”, or WAIK, from Microsoft’s web site, and install it on the Adaptiva Server machine
- Specify the path of the installation folder in the “WAIK location” field of the editor
- Check the box “Enable Unknown computer Support” if you’ll be supporting unknown computers in future
- Drag and drop one or more SCCM collections into the “Target collections” field
- Click on the “Enable” button
Watch As It Happens
At this point, you’ve done everything that you need to do. Just sit back and watch magic happen.
Finally, OneSite PXE Boots a Machine
Here is a VM booting up using Adaptiva OneSite Peer to Peer PXE.
Remember, P2P PXE is included with your basic OneSite license – there are no additional licensing costs, and no consulting services that need to be purchased.


