
App-V helps organizations deliver applications on-demand. An application is sequenced and delivered as a virtual app to endpoints. The method for sequencing an application is different depending on the app. Some applications, like the Office 365 Suite, can be sequenced using an accelerator. Others must be captured by performing an installation on a clean machine.
App-V applications can be distributed through an already-existing Configuration Manager instance, or set up with their own management infrastructure. In this post, we’ll focus more on ConfigMgr deployment. This article assumes that you have at least ConfigMgr 1702 and Windows 10 1703.
Starting with Windows 10 1607, App-V is no longer part of the Microsoft Desktop Optimization Pack. App-V is now included in the Enterprise and Education SKUs of Windows 10.
What’s New
Prior to Windows 10 1607, App-V was a separate client that needed to be installed on all workstations. Starting with Windows 10 1607, the App-V client is a feature that you enable in the operating system. You must be running the Enterprise or Education SKU of Windows 10 to use the App-V client.
There are two ways to enable the App-V client. First, there’s a Group Policy settings called “Enable App-V Client” located at Computer Configuration > Administrative Templates > System > App-V. Enabling this setting and restarting the device will enable the client.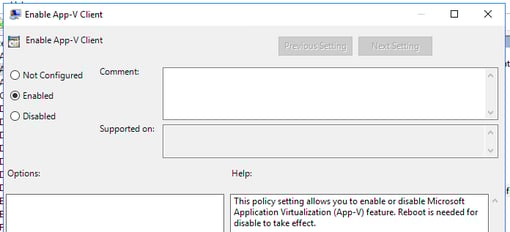
The other method to enable the App-V client is to run the command “enable-appv” from PowerShell and restart the device.
Windows 10 1703 came with a new feature for App-V called the auto sequencer. That will be the primary focus of this post. The new auto sequencer can set up your sequencing environment (usually a few VMs) and sequence your packages in batches. It can also update your packages in batches. The sequencer is installed from the latest version of the Windows 10 ADK.
Setup Auto Sequencing
To use the auto sequencer, you must have a computer installed with Windows 10 1703 and Hyper-V enabled. You will also need to download the latest version of the Windows 10 ADK and install both the App-V Sequencer and the App-V auto sequencer on the physical machine (not the VM)..webp?width=641&name=app-v-003%20(2).webp)
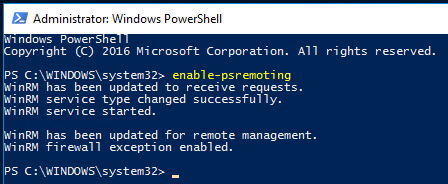
You must enable PowerShell remoting on the host. Run this command from an admin PowerShell prompt:
You will receive this output letting you know it was successful:
Now we need to create our sequencer VM. The easiest way to do this is to use the Convert-WindowsImage command-line tool. To get this, download this script file from the TechNet Gallery. This tool will take a Windows installer ISO and convert it to a VHD file. Open this file in PowerShell ISE and execute it to load the tool. Now we have a new cmdlet called “Convert-WindowsImage”. To generate the ISO, run this command:
Ex: convert-windowsimage -sourcepath “C:\sequencer\windows10-1703-ent.iso” -vhdformat vhd -vhdpartitionstyle MBR -vhdpath “C:\sequencer\auto-sequencer01.vhd”
You MUST use a format of VHD and a partition style of MBR or the process will not work. The VHD will take some time to create.
While the VHD is building, you can download the installation files for the Windows 10 1703 ADK, if you haven’t already. You will need a copy of them for the next step. After the VHD is created, run this command to provision the VM in Hyper-V.
Ex: new-appvsequencervm -vmname “AutoSequencer01” -adkpath “C:\sequencer\1703adk” -vhdpath “C:\sequencer\auto-sequencer01.vhd” -vmmemory 2048MB -vmswitch “switch1”
We assign a memory value with this command, but it’s not required (the default setting is 1024MB). If you want to modify CPU allocation or hard drive size, I recommend waiting until the process is complete. This step also takes some time, as the VM must go through OOBE, install the App-V Sequencer, take a snapshot, and be configured properly.
Sequence an App
You must create an XML file to auto-sequence an app. There are several properties. Here’s an example:
<Applications>
<Application>
<AppName>Firefox</AppName>
<InstallerFolder>C:\sequencer\Firefox</InstallerFolder>
<Installer>FirefoxSetup.exe</Installer>
<InstallerOptions>/S</InstallerOptions>
<Package>C:\sequencer\Appv_Apps\Firefox.appv</Package>
<TimeoutInMinutes>20</TimeoutInMinutes>
<Cmdlet>True</Cmdlet>
<Enabled>True</Enabled>
</Application>
</Applications>
</xml>
This example only includes one application, but you can do them in batch by adding another section.
After you have your XML file, run this command from the host:
Ex: new-batchappvsequencerpackage -configfile “C:\sequencer\firefox.xml” -vmname “AutoSequencer01” -outputpath “C:\sequencer”
The host will ask you do RDP to the sequencer VM. If you set this up to be silent by using the property, you will not see anything. If the installation is not silent, you will be able to click through the installation properties. The sequencer will launch the installations one by one until you’re done. Once complete, the RDP session will exit and the host will copy the package from the VM.
After you have the App-V package, you can import it in to ConfigMgr and deploy it like any other App-V package.